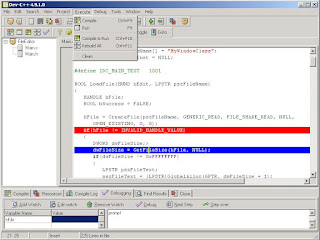
Dev-C++ is not some bug-ridden, limited edition C++ compiler from some flyby- night group of developers. Dev-C++ is a full-fledged C++ environment. Dev- C++ supports the entire C++ language and executes all the programs you might find in the internet and any other C++ book) and works just fine.
Dev-C++ does generate Windows-compatible 32-bit programs, but it does not easily support creating programs that have the classic Windows look. If you want to do that, you’ll have to break open the wallet and go for a commercial package like Visual Studio.NET.
You can download a trial of Bloodshed Dev-C++ by clicking this link: http://download.cnet.com/Dev-C/3000-2069_4-12686.html
Using Dev-C++
This section is probably why you are here.
All programming done for CSC161 will require separate compilation projects (i.e. class header file(s), class implementation file(s) and a main/application/client/driver file). This process is relatively easy as long as you know what Dev-C++ requires to do this.
Step 1: Configure Dev-C++.
We need to modify one of the default settings to allow you to use the debugger with your programs.
- Go to the "Tools" menu and select "Compiler Options".
- In the "Settings" tab, click on "Linker" in the left panel, and change "Generate debugging information" to "Yes":
- Click "OK".
Step 2: Create a new project.
A "project" can be considered as a container that is used to store all the elements that are required to compile a program.
- Go to the "File" menu and select "New", "Project...".
- Choose "Empty Project" and make sure "C++ project" is selected.
Here you will also give your project a name. You can give your project any valid filename, but keep in mind that the name of your project will also be the name of your final executable. - Once you have entered a name for your project, click "OK".
- Dev-C++ will now ask you where to save your project.
Step 3: Create/add source file(s).
You can add empty source files one of two ways:
- Go to the "File" menu and select "New Source File" (or just press CTRL+N) OR
- Go to the "Project" menu and select "New File".
Note that Dev-C++ will not ask for a filename for any new source file until you attempt to:- Compile
- Save the project
- Save the source file
- Exit Dev-C++
- Go to the "Project" menu and select "Add to Project" OR
- Right-click on the project name in the left-hand panel and select "Add to Project"
If you do have suggestions, feel free to comment below..


